

How To: Baby Room Wall Hanging
I was so excited to hear that my cousin Megan is having a baby girl and even more excited when she asked me if I would make her a wall hanging for her baby room!

She sent me a photo of her baby decor and my goal was to match her art work for the room. I mean can we JUST talk about how cute these baby animal photos are?!
In celebration of this momentous occasion, I decided to give make her a super cute crochet wall hanging/dream catcher. It was so cute that I’ve included a step by step tutorial so you can make one for yourself!
DIY Dream Catcher Wall Hanging Materials & Tools

For this crochet dream catcher wall hanging project, I started with my favorite vibrant cotton yarn and a 12’’ hoop. After trying a few color combinations, I used Aunt Lydia Classic Crochet Thread in Golden Rod, White, Mint Green, Wood Violet and Light Peach.
Let’s get started!
Step One

Ch 4, ss into the loop.
Round 1: Ch 2 (counts as dc,) 15 dc into the loop, ss into ch 2.
Round 2: Ch 3, dc in next st, (ch 1, dc in next st) Repeat 14 more times. Ss into 2nd ch.
Round 3: Ss into ch, ch 1, dc2tog, (ch 2, dc2tog into next ch) repeat 14 more times, Ss into dc2tog.
Step Two

Round 4: Ss into the ch, ch 5, (dc into next ch, ch 3) Repeat 14 more times. Ss into 2nd ch.
Step Three

Round 5: Ss into the ch, (popcorn st into ch sp, ch 3) repeat 15 times, Ss into popcorn st.
Popcorn st: 4dc, ss into 1st dc
Step Four

Round 6: Ss into the ch, ch 4, sc into next ch repeat 15 times.
Round 7: Ss into 1st and 2nd ch, Ch 5, Sc into next ch. Repeat 15 times.
Step Five

Round 8: Ss into 3rd ch *(3tc, ch 2, 3tc) into the 3rd ch on next ch sp, sc into the 3rd ch on next ch sp)* repeat 7 times Repeat from * to * 7 more times.
Step Six

Round 9: Ss into the tc, *(dc2tog into tc) repeat 2 more times. (dc2tog, ch 2. dc2tog) into ch sp. (dc2tog into tc) repeat 2 more times.* Repeat from * to * 7 more times
Step Seven

After tying the motif to the hoop, wire some florals to the edge of the hoop. Get creative!!
Step Eight
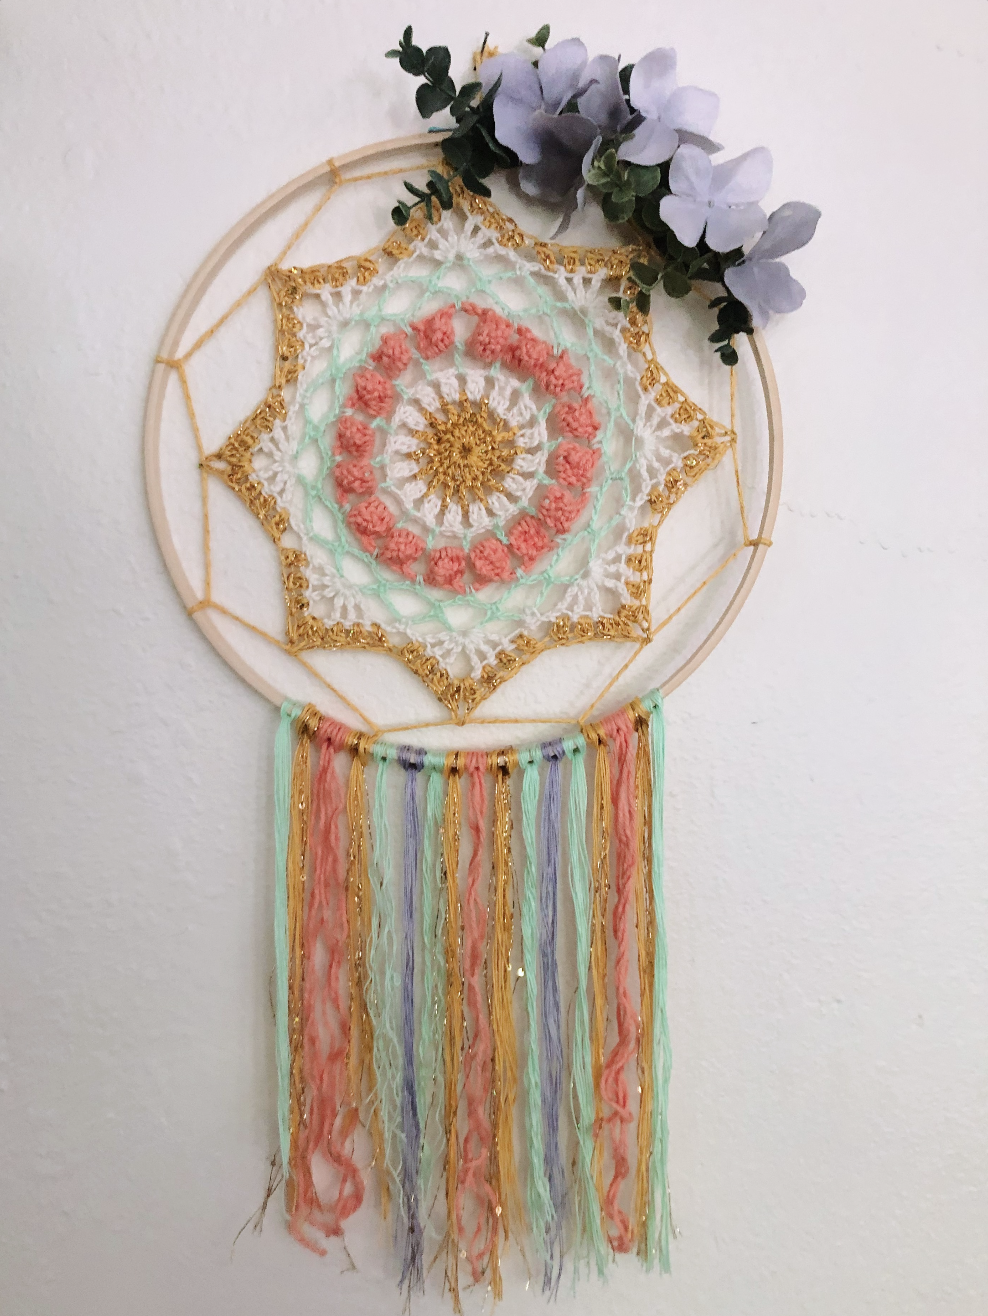
Lastly, I added some matching tassels to the bottom of the hoop and TA-DA!!! its finished!

I was so happy to see how perfectly the dream catcher matched the baby decor. It was the perfect touch right above the crib. I hope it gives beautiful dreams to a very beloved baby girl.
